PowerFlex / VxFlex / ScaleIO has a long and rich history with OpenStack – being a natural fit for a scale-out cloud compute architecture, it has been a mainstay of the upstream OpenStack code base for many years.
Used in many of the largest telco’s and other innovative companies around the world, OpenStack continues to keep on delivering for those that are more inclined to design a public or private cloud free of shackles.
PowerFlex is currently leading the way when it comes to OpenStack — and it supports more of the optional OpenStack Cinder features than any other block storage product in the market today. (Dell EMC Unity also shares the same capabilities crown, but only one of them is massively scale-out).
https://docs.openstack.org/cinder/ussuri/reference/support-matrix.html
| Feature | Status | Dell EMC VxFlex OS (ScaleIO) Storage Driver (ScaleIO) |
|---|---|---|
| Supported Vendor Driver | optional | ✔ |
| Extend an Attached Volume | optional | ✔ |
| Snapshot Attachment | optional | ✔ |
| QoS | optional | ✔ |
| Volume Replication | optional | ✔ |
| Consistency Groups | optional | ✔ |
| Thin Provisioning | optional | ✔ |
| Volume Migration (Storage Assisted) | optional | ✔ |
| Multi-Attach Support | optional | ✔ |
| Revert to Snapshot | optional | ✔ |
Cinder integration
First of all, please check out the excellent whitepaper on Red Hat OpenStack 13 with PowerFlex:
https://infohub.delltechnologies.com/section-assets/redhat-openstack-platform13-000070
This paper is perfect for those looking to implement PowerFlex plus RHOSP into a production environment.
For those that are just looking to experiment though, I would strongly encourage setting up a single RDO Packstack environment to get started.
Pre-requisities
- CentOS 7.x VM / physical server / CentOS 8.2 (this build guide will be off 8.2 with Ussuri release)
- Connectivity to your PowerFlex storage environment.
- RDO Packstack – https://www.rdoproject.org/
Step 1 – Get your CentOS machine up and running.
In my environment, I stood this up as VM running on top of ESXi 6.7.
I gave the VM a 100GB OS drive, 8vCPU’s and 32GB RAM, and 3x NICs. (1 NIC for application/management traffic, and the other 2x for backend SDC<>SDS PowerFlex data network traffic).
(I also quickly provisioned this VM using Jono’s terraform script)
Step 2 – Install the SDC on your VM:
Assuming that you have IP’s on your 2x backend SDC<>SDS NICs, this is a piece of cake:
MDM_IP=<MDM virtual IP #1>,<MDM virtual IP #2> rpm -i EMC-ScaleIO-sdc-3.5-0.468.el7.x86_64.rpm
Step 3 – Follow the Packstack install instructions:
https://www.rdoproject.org/install/packstack/
Specifically:
For CentOS 8.x:
$ sudo dnf install network-scripts -y$ sudo systemctl disable firewalld
$ sudo systemctl stop firewalld
$ sudo systemctl disable NetworkManager
$ sudo systemctl stop NetworkManager
$ sudo systemctl enable network
$ sudo systemctl start networkAnd then:
$ sudo dnf update -y
$ sudo dnf config-manager --enable PowerTools
$ sudo dnf install -y centos-release-openstack-ussuri
$ sudo dnf update -y
$ sudo dnf install -y openstack-packstack
$ sudo packstack --allinone
If however you want to be access your VM’s over the network, please follow this additional guide: https://www.rdoproject.org/networking/neutron-with-existing-external-network/
In my situation, I ran the following:
# packstack --allinone --provision-demo=n --os-neutron-ovn-bridge-mappings=extnet:br-ex --os-neutron-ovn-bridge-interfaces=br-ex:ens256Congratulations! At this stage you should hopefully have Packstack up and running.
Step 4 – Edit your /etc/cinder/cinder.conf to add your PowerFlex storage.
The official Ussuri documentation on this portion is excellent, please follow it, or follow my steps below. It should be noted that due to product name changes (ScaleIO/VxFlex/PowerFlex) there has been various different configuration variables used.
Right at the start of the file, I inserted the following:
[DEFAULT]
enabled_backends = powerflex
default_volume_type = powerflex

[powerflex]
volume_driver = cinder.volume.drivers.dell_emc.vxflexos.driver.VxFlexOSDriver
volume_backend_name = powerflex
san_ip = <Insert PowerFlex GW Server IP>
vxflexos_storage_pools = <Protection Domain name>:<Storage Pool name>
san_login = admin
san_password = <Insert Password>
vxflexos_max_over_subscription_ratio = 10
Restart the Cinder Volume service:
# systemctl restart openstack-cinder-volume.service
Next create the Cinder Volume type:
[root@OpenStack-111 ~]# source keystonerc_admin
[root@OpenStack-111 ~(keystone_admin)]# openstack volume type create powerflex
[root@OpenStack-111 ~(keystone_admin)]# openstack volume type set --property volume_backend_name=powerflex powerflex
[root@OpenStack-111 ~(keystone_admin)]# openstack volume type set --property pool_name=<Protection Domain name>:<Storage Pool name> powerflex
Next for the Nova compute service you will need to also add a connector:
mkdir -p /opt/emc/scaleio/openstack
touch /opt/emc/scaleio/openstack/connector.conf
vi /opt/emc/scaleio/openstack/connector.conf
In this file add:
[powerflex]
san_password = <MDM Password>
You should now be ready to give things a try. (Also, it may not be a bad idea to reboot at this stage either, if something doesn’t work later on the first thing you may wish to try is “have you tried turning it off and on again?”)
Step 5 – Visit your OpenStack Dashboard
http://<your OpenStack IP>/dashboard
Your username will be admin, and your password is located in your “keystonerc_admin” file which was created in the same directory as where you kicked off the install earlier.
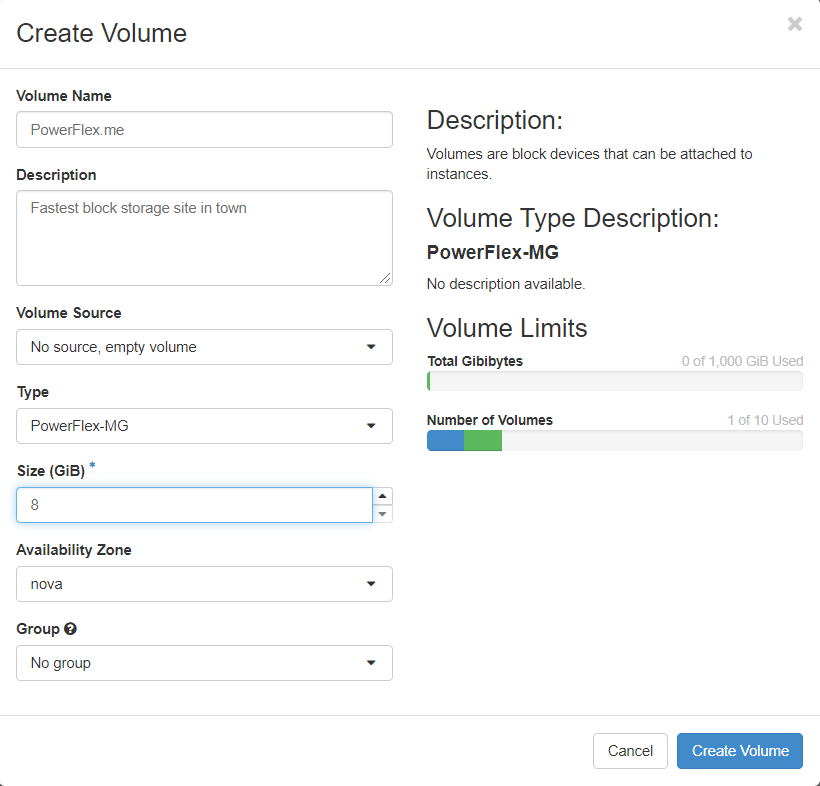
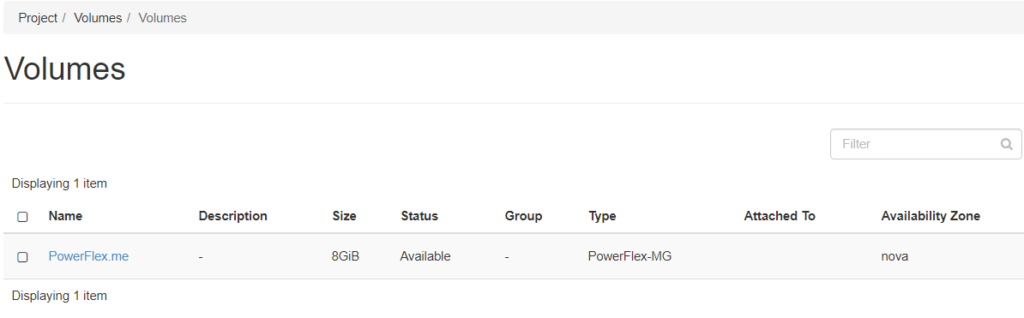
Step 6 – Create a test Volume
Go to Project > Volumes > Volumes > + Create Volume:
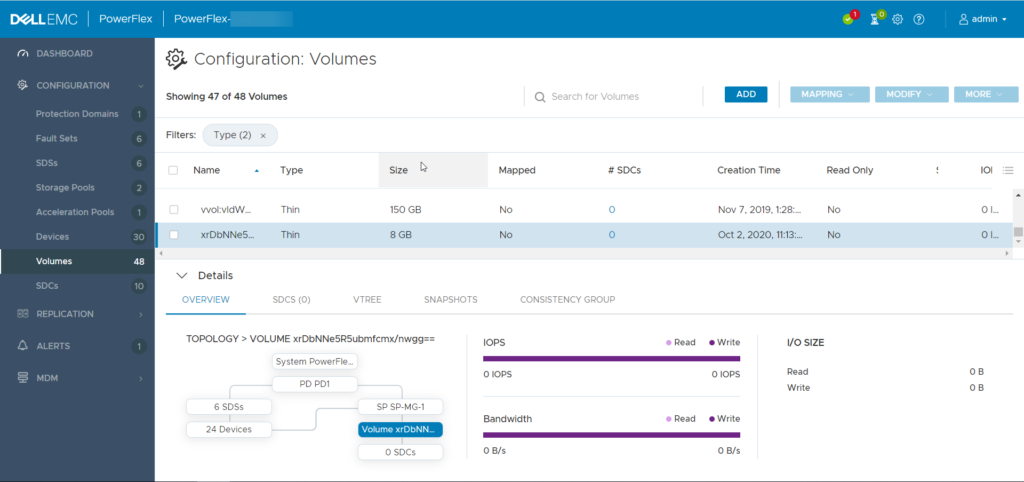
Check in your PowerFlex GUI that it has been created:
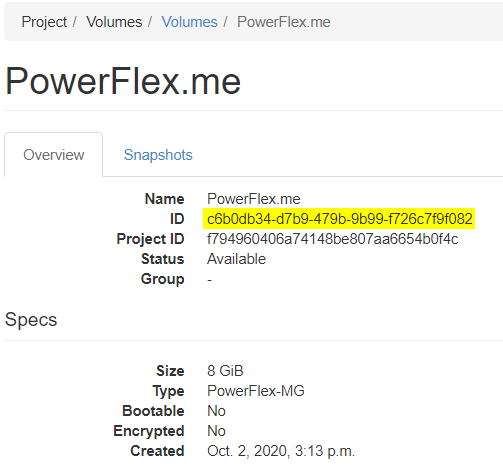
In order to understand the mapping between OpenStack Volumes, and PowerFlex Volumes, you will need to convert from base64 to binascii:
From Cinder GUID to PowerFlex volume name:
| python -c ‘import binascii, base64, sys; print(base64.b64encode(binascii.unhexlify(sys.argv[1].replace(“-“, “”))).decode(“utf-8”))’ “${vol_uuid}” |
From PowerFlex volume name to Cinder GUID:
| python -c ‘import binascii, base64, sys; xstr = binascii.hexlify(base64.b64decode(sys.argv[1])).decode(“utf-8”); print(“-“.join((xstr[:8], xstr[8:12], xstr[12:16], xstr[16:20], xstr[20:])))’ “${vol_name}” |
In my example above, the PowerFlex Volume name is “xrDbNNe5R5ubmfcmx/nwgg==”
[root@OpenStack-111 ~(keystone_admin)]# python -c 'import binascii, base64, sys; xstr = binascii.hexlify(base64.b64decode(sys.argv[1])).decode("utf-8"); print("-".join((xstr[:8], xstr[8:12], xstr[12:16], xstr[16:20], xstr[20:])))' "xrDbNNe5R5ubmfcmx/nwgg=="
c6b0db34-d7b9-479b-9b99-f726c7f9f082
Step 7 – RDO PackStack Networking
This was the most difficult section to figure out properly in my environment, so I hope that these tips help someone else save a lot of time in their environment.
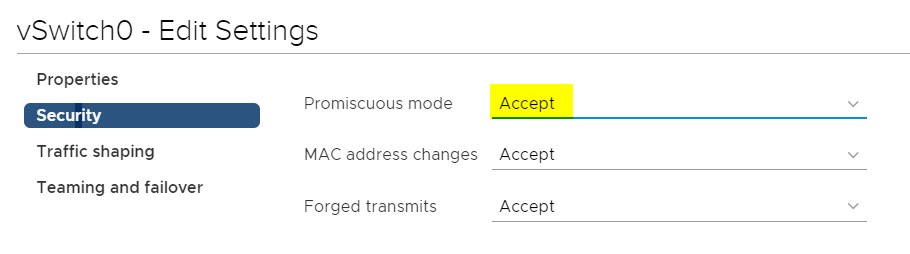
The biggest show-stopper for myself, was the default ESXi vSwitch policy to disable Promiscuous mode. Once I enabled that, things started working and much less hair pulling was occurring! (Thank you Kevin M Jones).
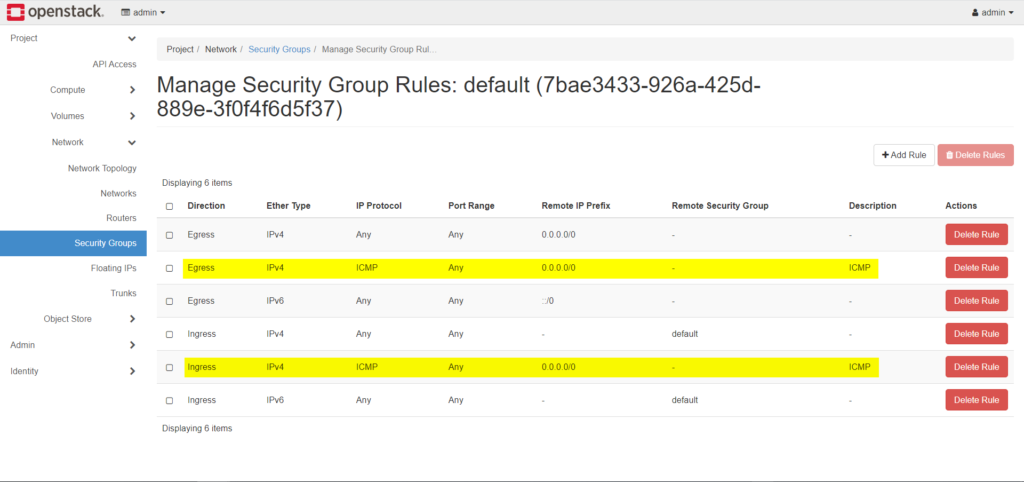
Another small thing was simply allowing ICMP traffic through the default Security Group:
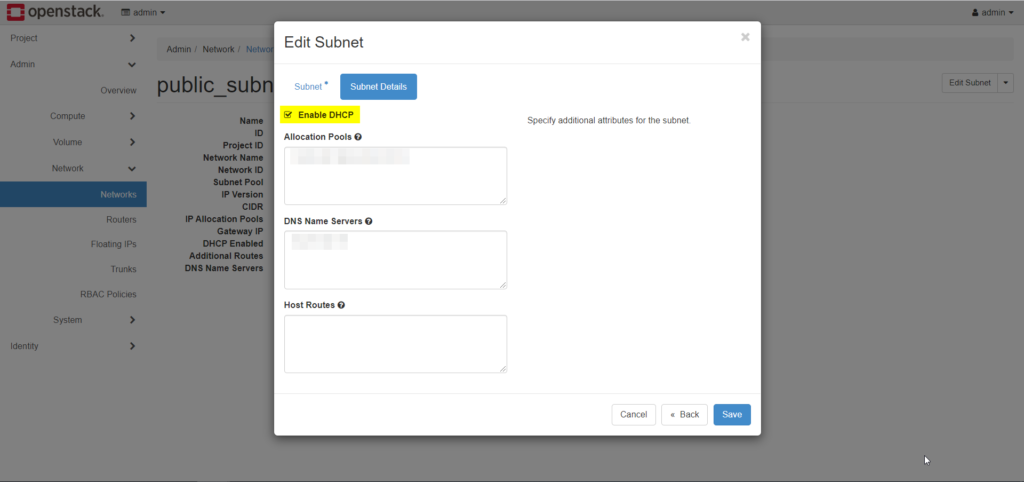
And finally, enabling DHCP on my public_subnet Network, allowed my Instances to finally get an IP and gateway properly:
Step 8 – Upload an Image
Grab some cloud images of popular operating systems from here:
https://docs.openstack.org/image-guide/obtain-images.html
I grabbed the CentOS 7 image from here.
Next, go into you OpenStack dashboard > Project > Compute > Images
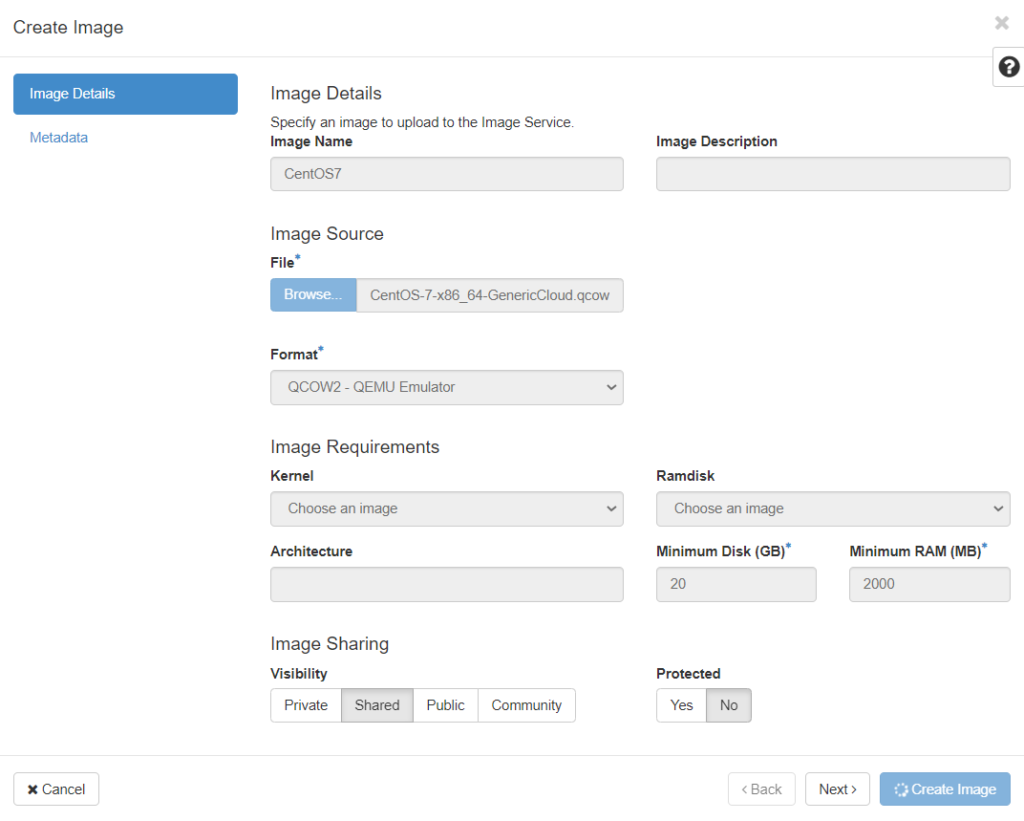
After the image has been created you should then see it in your list of Images, at which point you can click the “Launch” button beside it.
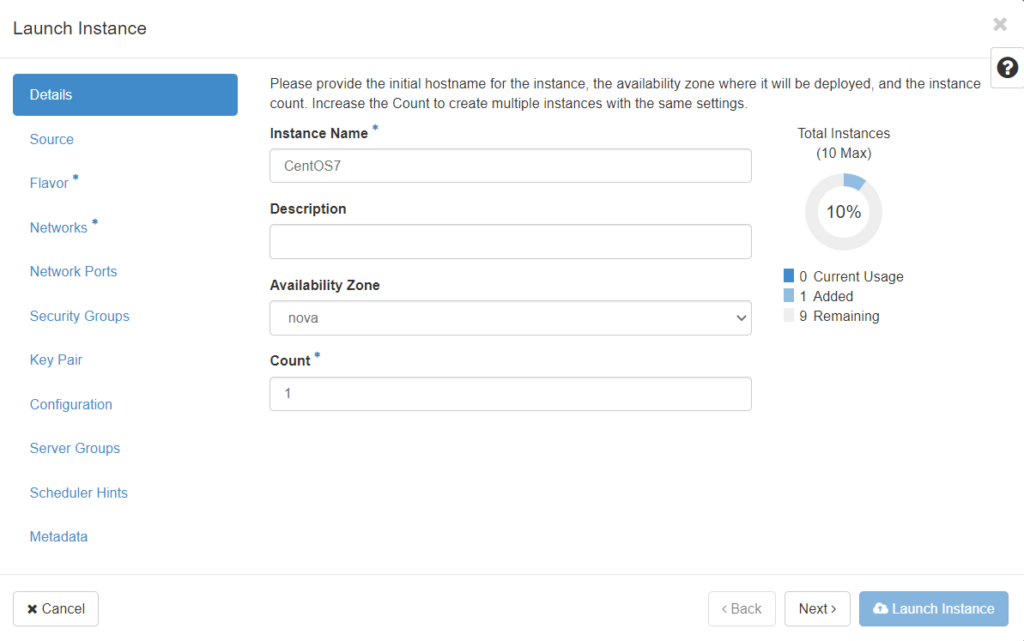
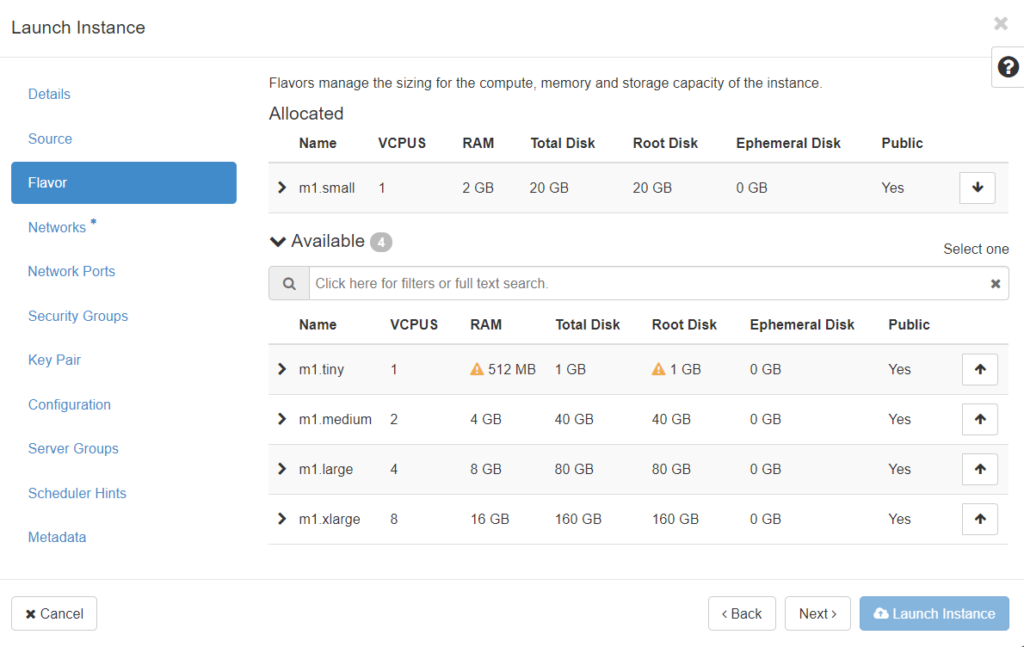
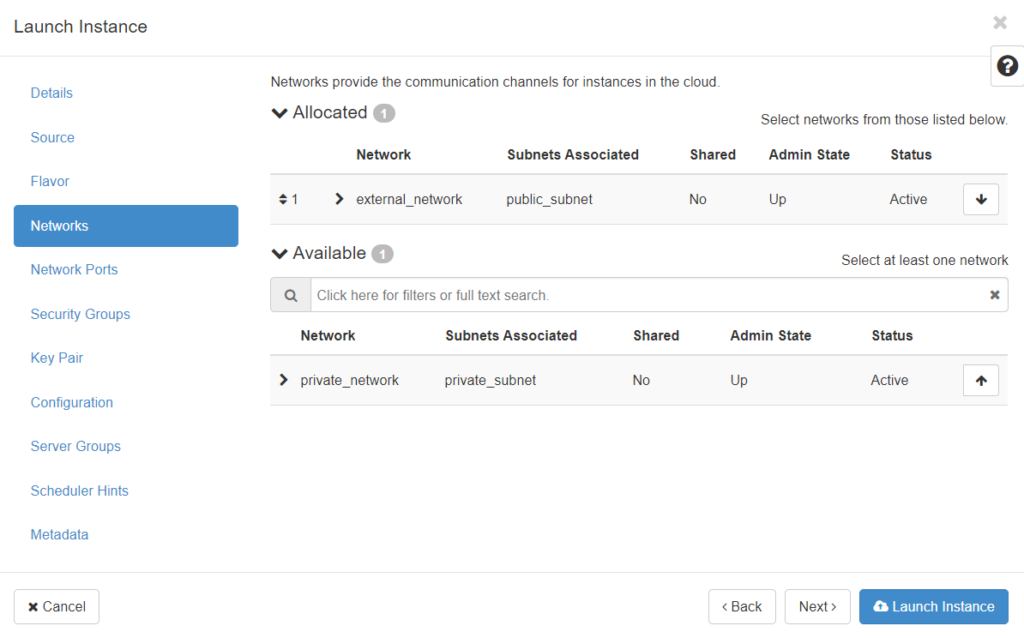
Click through the options, the critical ones are Flavor and Networks:
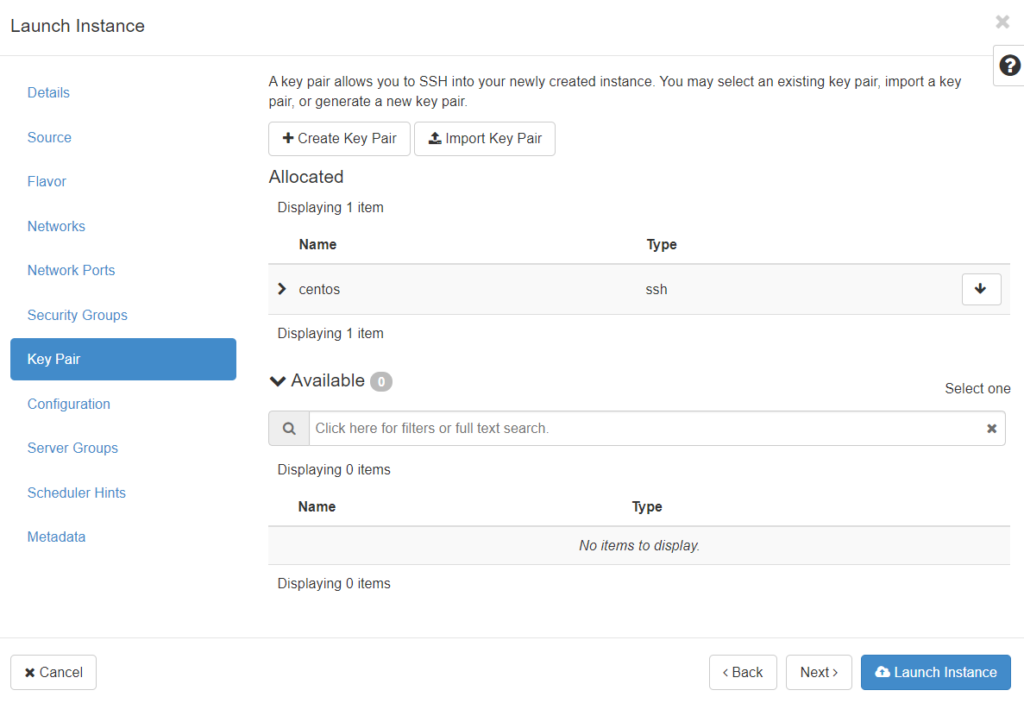
The Key Pair section is critical to the CentOS image, as it does not come with a password by default and you must SSH in with a key. Go ahead and Create Key Pair (it will download a copy to your local machine), and make sure it’s then allocated to this Instance.
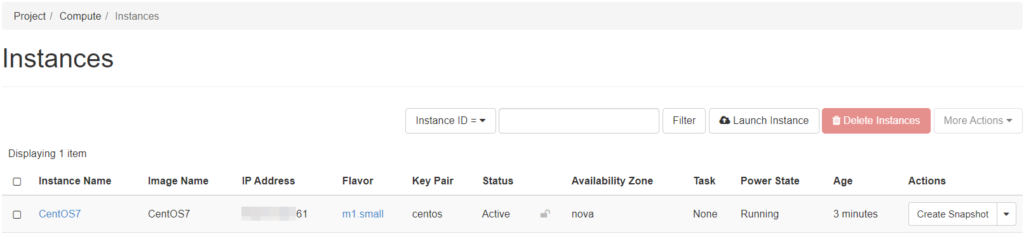
Finally click Launch Instance, and if everything goes well you should end up with a working VM in just a few minutes!
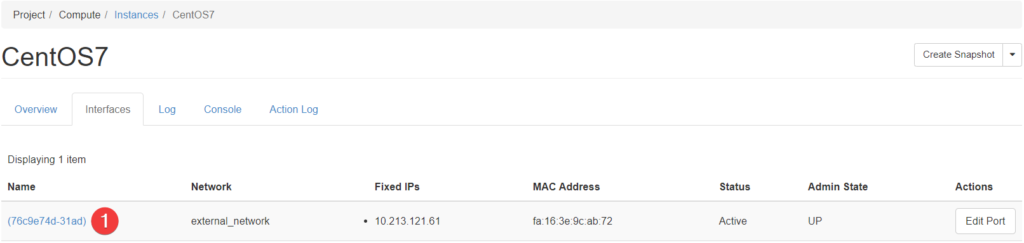
In my case, I still had one thing today adjust in order to get into the VM, go to Interfaces and get yourself into the Edit Port view:
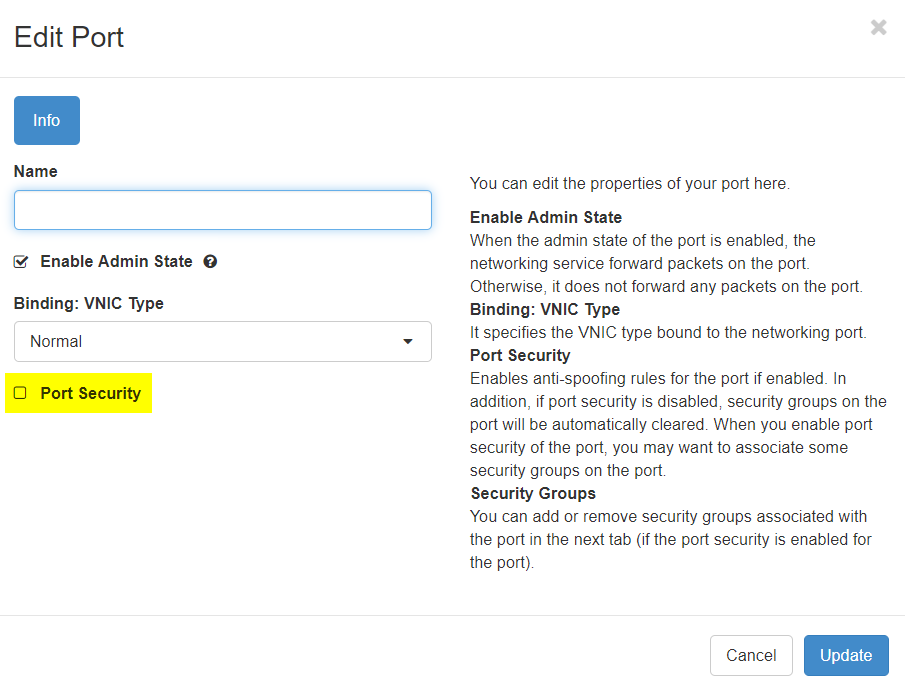
And then disable “Port Security”
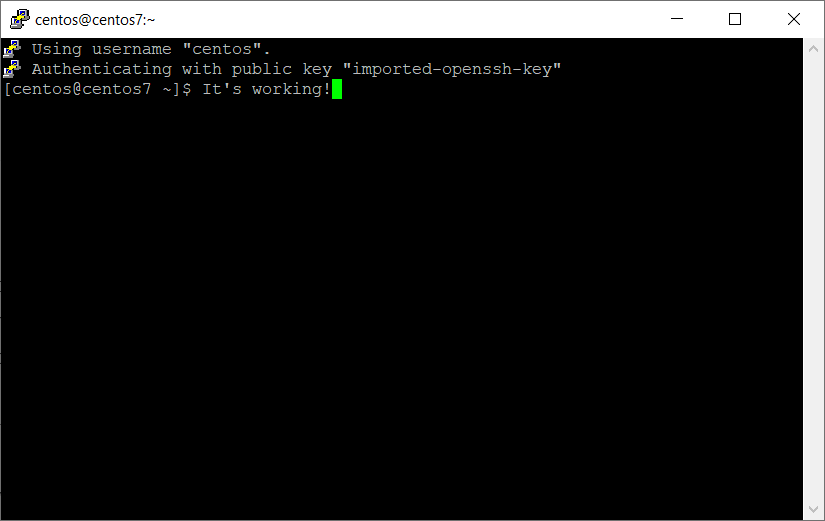
At this point, you should now be able to SSH into the VM using “centos” as the username, and your ssh key that was downloaded earlier. If using PuTTy, you will need to convert your key first using PuTTygen.
Cinder Troubleshooting tips
- Check the logs at /var/log/cinder
- Check your PowerFlex Gateway – use the Test REST API feature in the Maintain section.
- Flip your MDM’s and log back into PowerFlex Gateway and Test REST API again. Approve any certificates necessary.
Best practices for PowerFlex with OpenStack
- In a production environment, ensure that everything is highly available as there is a high dependency on the PowerFlex Gateway for REST API functionality.
- This includes using HA-Proxy to setup your PowerFlex Gateway. Please see here for more detail on how to do this.
- Ensure you have vendor support for any production environment. While upstream is cool, it’s even cooler to have someone to call when you’re desperate!
Questions / Comments / Thoughts? – Please feel free to discuss below.