Anyone that has installed PowerFlex Manager into a PowerFlex rack or appliance environment will be aware that it is supplied in an OVA format and is intended to be used on a VMware hypervisor platform. This is the Dell SUPPORTED platform for the management plane.
However, for PowerFlex appliance environments with no VMware requirement, I am frequently asked if the management environment ‘could’ run on another hypervisor. For PowerFlex rack, a complete management infrastructure is included and this is currently based on VMware.
With this in mind, I decided to carry out my own investigation, a bit of a science project…
Having played with KVM on Red Hat based Linux distributions previously, I learnt that with the 8.x versions, the management of virtual machines and their network requirements is hugely simplified through the cockpit web management interface. When it comes to Red Hat based distributions, the ‘new kid on the block’ is Rocky Linux, hence I thought I should give it a try.
I installed a minimal installation of Rocky 8.4 on to a server, configured the network and performed a full update with dnf. In order to run KVM, the CPU must have the necessary extensions (the command below is for Intel CPUs, for AMD replace ‘vmx’ with ‘svm’).
# grep -e 'vmx' /proc/cpuinfo
flags           : fpu vme de pse tsc msr pae mce cx8 apic sep mtrr pge mca cmov pat pse36 clflush dts acpi mmx fxsr sse sse2 ss ht tm pbe syscall nx pdpe1gb rdtscp lm constant_tsc arch_perfmon pebs bts rep_good nopl xtopology nonstop_tsc cpuid aperfmperf pni pclmulqdq dtes64 monitor ds_cpl vmx est tm2 ssse3 sdbg fma cx16 xtpr pdcm pcid sse4_1 sse4_2 x2apic movbe popcnt tsc_deadline_timer aes xsave avx f16c rdrand lahf_lm abm cpuid_fault epb invpcid_single pti ssbd ibrs ibpb stibp tpr_shadow vnmi flexpriority ept vpid ept_ad fsgsbase tsc_adjust bmi1 avx2 smep bmi2 erms invpcid xsaveopt dtherm ida arat pln pts md_clear flush_l1d
Also check that the KVM kernel modules are loaded
# lsmod | grep kvm
kvm_intel             315392  0
kvm                   847872  1 kvm_intel
irqbypass              16384  1 kvm
Install and configure the cockpit web based management interface
# dnf install -y cockpit cockpit-machines
.
.
.

# systemctl enable --now cockpit.socket
Created symlink /etc/systemd/system/sockets.target.wants/cockpit.socket â /usr/lib/systemd/system/cockpit.socket.

# systemctl status cockpit.socket
â cockpit.socket - Cockpit Web Service Socket
   Loaded: loaded (/usr/lib/systemd/system/cockpit.socket; enabled; vendor preset: disabled)
   Active: active (listening) since Thu 2021-08-26 16:36:13 BST; 9s ago
     Docs: man:cockpit-ws(8)
   Listen: [::]:9090 (Stream)
  Process: 8112 ExecStartPost=/bin/ln -snf active.motd /run/cockpit/motd (code=exited, status=0/SUCCESS)
  Process: 8104 ExecStartPost=/usr/share/cockpit/motd/update-motd  localhost (code=exited, status=0/SUCCESS)
    Tasks: 0 (limit: 100475)
   Memory: 628.0K
   CGroup: /system.slice/cockpit.socket
Ensure that the firewall has been configured to allow cockpit traffic to pass
# firewall-cmd --list-all
public (active)
  target: default
  icmp-block-inversion: no
  interfaces: enp0s20u2u3i5
  sources:
  services: cockpit dhcpv6-client ssh
  ports:
  protocols:
  masquerade: no
  forward-ports:
  source-ports:
  icmp-blocks:
  rich rules:
If it is not enabled the commands below will enable it
# firewall-cmd --add-service=cockpit --permanent
success
# firewall-cmd --reload
success
Browse to the IP address of the server at port 9090 (https://<IP address>:9090)
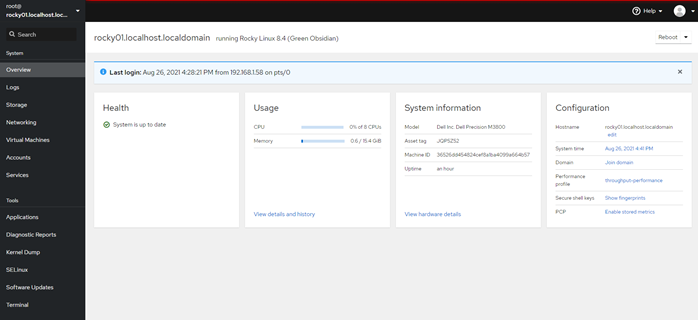
Enter the credentials to log into the system, an overview of the system will be presented.
Install the virtualisation module and other virtualisation packages. Start the libvirtd service
# dnf module install -y virt

# dnf install -y virt-install virt-viewer

# systemctl enable --now libvirtd.service
# systemctl status libvirtd.service
  libvirtd.service - Virtualization daemon
   Loaded: loaded (/usr/lib/systemd/system/libvirtd.service; enabled; vendor preset: enabled)
   Active: active (running) since Thu 2021-08-26 16:46:55 BST; 10s ago
     Docs: man:libvirtd(8)
           https://libvirt.org
 Main PID: 11083 (libvirtd)
    Tasks: 19 (limit: 32768)
   Memory: 18.0M
   CGroup: /system.slice/libvirtd.service
As stated at the very beginning of this post, PowerFlex Manager is supplied as an OVA, this needs to be copied to the system, extracted and converted to qcow2 format in order to run as a virtual machine on KVM. A separate working directory was created, the OVA was copied there and the files extracted from it using tar. The actual disk image is the vmdk file.
# mkdir PowerFlexManager
# mv DellEMC-PowerFlexManager-3.7.0-7776_VMware.ova PowerFlexManager/
# cd PowerFlexManager/
# tar xf DellEMC-PowerFlexManager-3.7.0-7776_VMware.ova
# ls -l
total 18192764
-rw-r--r--. 1 root root 9314693120 Aug 26 13:14 DellEMC-PowerFlexManager-3.7.0-7776_VMware.ova
-rw-rw-r--. 1 root root       2414 Jul  7 06:51 packer-PFxM-7776.cert
-rw-r--r--. 1 root root 9314535424 Jul  2 23:57 packer-PFxM-7776-disk1.vmdk
-rw-r--r--. 1 root root        145 Jul  2 23:49 packer-PFxM-7776.mf
-rw-r--r--. 1 root root     148105 Jul  2 23:49 packer-PFxM-7776.ovf
Using qemu-img, the vmdk disk image is converted to a qcow2 image, ensure there is sufficient disk capacity to house the new image!! This conversion can also be performed on a Windows system, a version of qemu-img for Windows can be found here: https://cloudbase.it/qemu-img-windows, it is possible to also convert the vmdk to a VHD and therefore run the virtual machine on Hyper-V.
After conversion the qcow2 image is listed in the directory
# qemu-img convert -f vmdk -O qcow2 packer-PFxM-7776-disk1.vmdk packer-PFxM-7776-disk1.qcow2

# ll
total 33704996
-rw-r--r--. 1 root root  9314693120 Aug 26 13:14 DellEMC-PowerFlexManager-3.7.0-7776_VMware.ova
-rw-rw-r--. 1 root root        2414 Jul  7 06:51 packer-PFxM-7776.cert
-rw-r--r--. 1 root root 15856893952 Aug 26 17:30 packer-PFxM-7776-disk1.qcow2
-rw-r--r--. 1 root root  9314535424 Jul  2 23:57 packer-PFxM-7776-disk1.vmdk
-rw-r--r--. 1 root root         145 Jul  2 23:49 packer-PFxM-7776.mf
-rw-r--r--. 1 root root      148105 Jul  2 23:49 packer-PFxM-7776.ovf
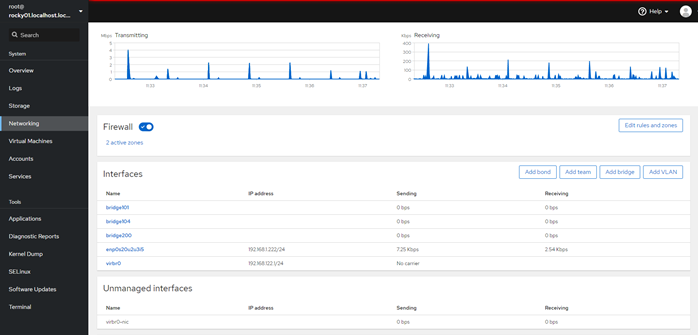
In exactly the same way as when running on VMware, the PowerFlex Manager needs to access three VLANs, in this deployment they are VLAN 101 (hardware management), VLAN 104 (deployment/installation), VLAN 200 (customer access). These could be configured by editing files in /etc/sysconfig/network-scripts or utilities such as nmtui/nmcli, however cockpit provides a very simple method to do this. These VLANs must also be configured on the network switch(es), trunked on the port(s) or port-channel.
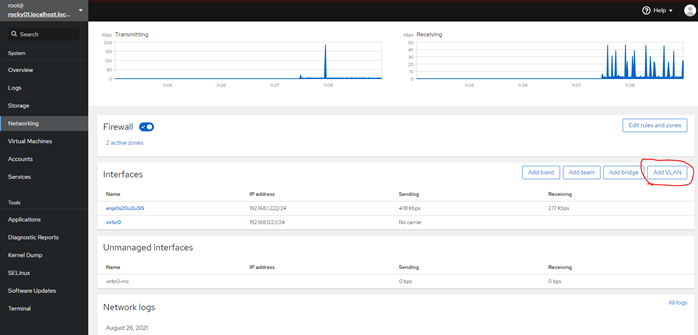
Select Networking in the left hand pane and then select Add VLAN
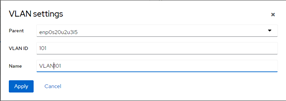
Complete the details for the new VLAN, the Parent is the interface this VLAN will be trunked on to, the VLAN ID is hopefully obvious, the Name can be anything but something that identifies it clearly is recommended.
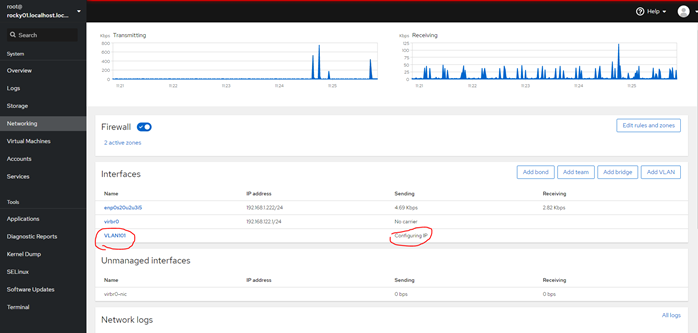
By default the system will attempt to configure an IP address on the physical host for the new VLAN, as this network is going to be used by virtual machines only, this is not really required. To disable the IP configuration, click on the new VLAN
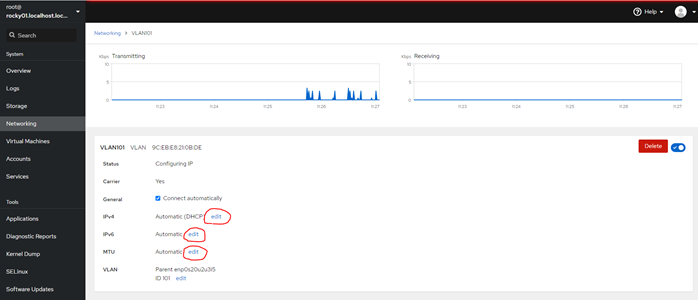
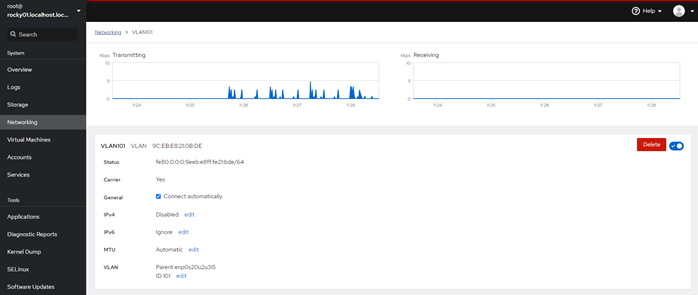
Edit the fields ringed in red, set IPv4 to Disabled, IPv6 to Ignore and if MTU is not the default, edit it to the appropriate size.
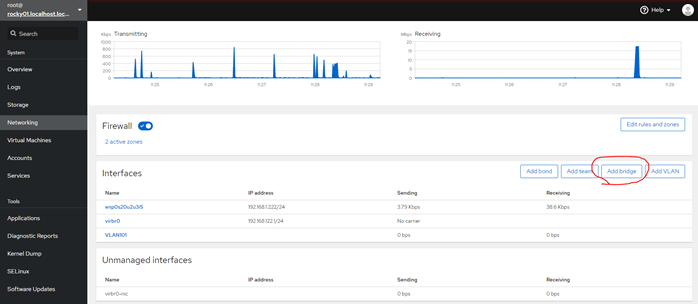
Next add a bridge to this VLAN that virtual machines can connect to, provide it with a suitable name and select the VLAN port it should connect to.
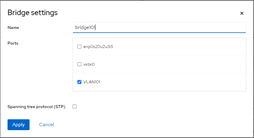
The configuration files generated can be displayed from the command line
# cat /etc/sysconfig/network-scripts/ifcfg-VLAN101
VLAN=yes
TYPE=Vlan
PHYSDEV=enp0s20u2u3i5
VLAN_ID=101
REORDER_HDR=yes
GVRP=no
MVRP=no
HWADDR=
NAME=VLAN101
UUID=0c171b22-c076-4f8d-a3e8-866a7a3acc95
DEVICE=VLAN101
ONBOOT=yes
BRIDGE=bridge101

# cat /etc/sysconfig/network-scripts/ifcfg-bridge101
STP=no
TYPE=Bridge
PROXY_METHOD=none
BROWSER_ONLY=no
IPV6INIT=no
NAME=bridge101
UUID=9599e01e-313c-429c-bed9-abfde27f8ede
DEVICE=bridge101
ONBOOT=yes
AUTOCONNECT_SLAVES=yes
Repeat the above steps for all required networks. NOTE: If the intention is to run the PowerFlex Gateway on this same KVM host, the PowerFlex Management and Data networks will need to be added (see the caveat at the end of this article as well).
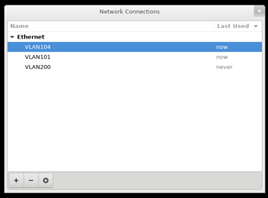
All three networks for the PowerFlex Manager virtual machine are now listed.
The PowerFlex Manager qcow2 disk image is copied to the default location for virtual machine images, the /var/lib/libvirt/images directory.
# cp PowerFlexManager/packer-PFxM-7776-disk1.qcow2 /var/lib/libvirt/images/
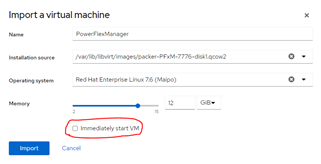
Return to the cockpit interface, in the left pane select Virtual Machines then click on Import VM

Provide a name for the virtual machine, for the Installation source use the qcow2 image at /var/lib/libvirt/images/packer-PFxM-7776-disk1.qcow2, select RHEL 7.6 as the Operating system and an appropriate memory size (note: the system used here has a very low memory capacity hence only 12GB was assigned).
Ensure the ‘Immediately start VM’ is unchecked.
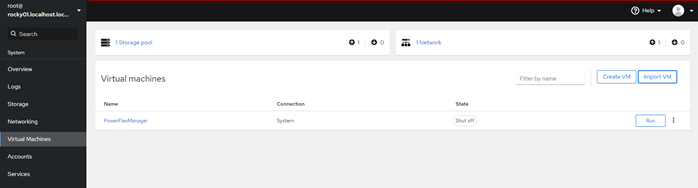
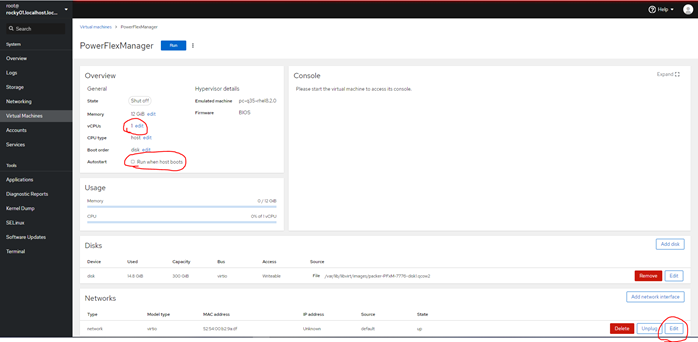
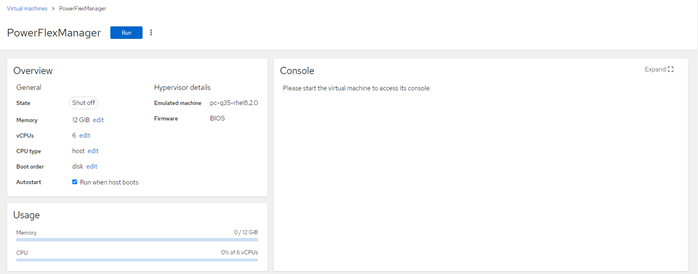
Click on the name of the virtual machine, edit the number of vCPUs and check ‘Run after host boots’ if this virtual machine should start when the physical host starts. Click on Edit for the network.
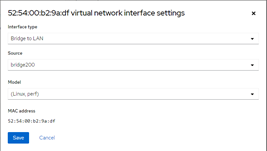
Change the Interface type to ‘Bridge to LAN’, change the Source to the correct bridge.
Add the additional networks to the virtual machine


All networks should now be listed, note the MAC addresses assigned as these will be required later in the process.

At this point it is very tempting to click the Run button on the virtual machine
However………………
The virtual machine will fail to boot correctly and exit to the dracut prompt.
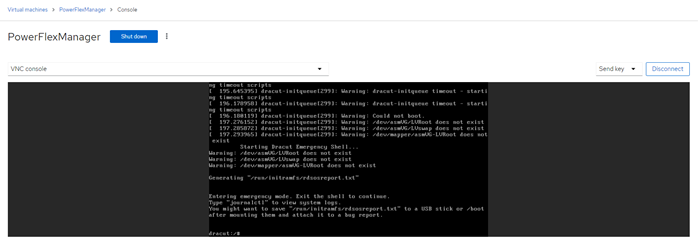
To fix this problem, the initial RAM disk of the virtual machine must be rebuilt. Click on the three vertical dots next to the shutdown button and select Force Reboot. When the grub menu appears (see screenshot below), use the down arrow key to select the rescue image but do NOT press enter. Make a note of the exact kernel version in the default boot option (the line that was highlighted before pressing the down arrow), in this example it is:
3.10.0-1160.31.1.el7.x86_64
Once this version is noted, press enter to boot from the rescue image.
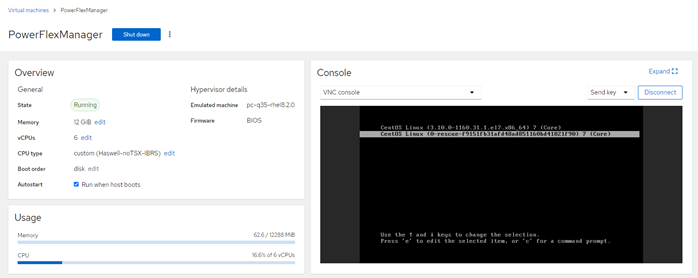
Click on Expand above the Console pane.
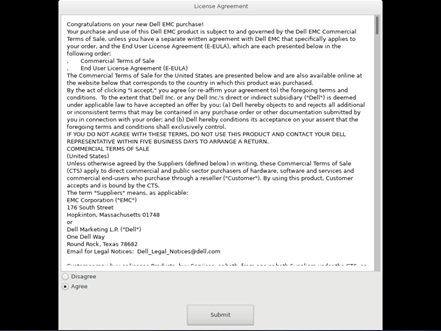
When the login prompt appears, log in as delladmin with a password of delladmin. Select Agree on the EULA and click on Submit.
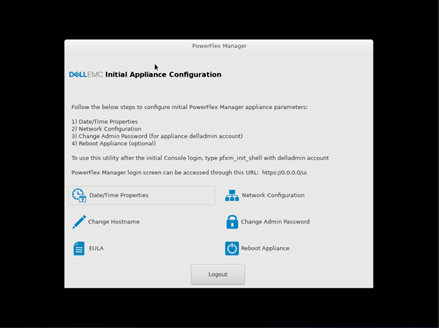
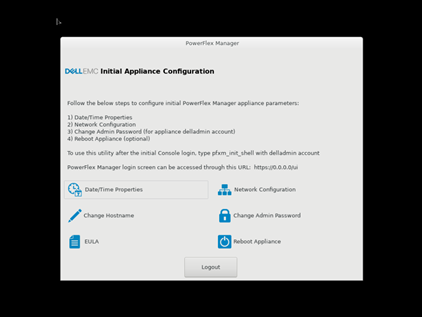
The initial setup screen for the PowerFlex Manager appliance appears. At this point do not configure the system, instead select Logout.
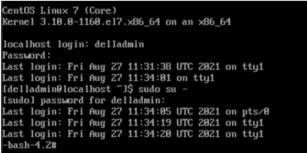
The login prompt should be displayed once again, login again as delladmin. On this occasion the system prompt will be displayed rather than the configuration menu.
Type sudo su – to gain elevated privilege and enter the delladmin password when prompted.
Rebuild the initial RAM disk with dracut (this is why it was so important to capture the exact kernel version earlier).

# dracut -f /boot/initramfs-3.10.0-1160.31.1.el7.x86_64.img 3.10.0-1160.31.1.el7.x86_64
Remove the single_run.lock file from /home/delladmin/.dell_app and reboot

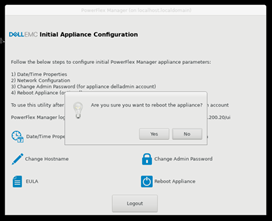
Once the system has rebooted, log in once again as delladmin, the Initial Appliance Configuration screen will appear once again.
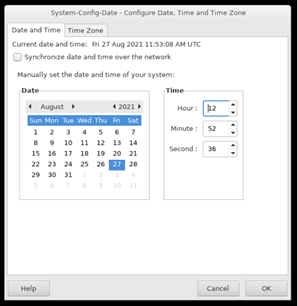
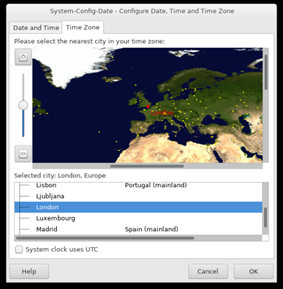
Configure the Date/Time Properties
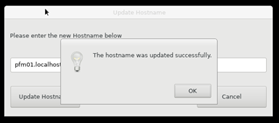
Set the Hostname

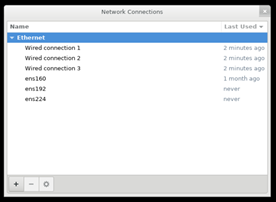
Next select Network Configuration, not only are the new network connections listed, also the VMware connections from the original virtual machine image are too.
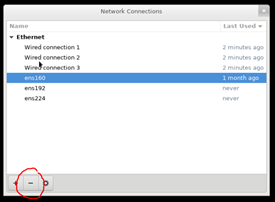
The VMware connections can be deleted by highlighting them and then selecting the minus symbol
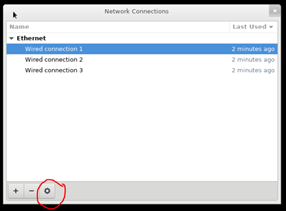
Leaving just the three connections configured on the virtual machine. Select each in turn and edit the settings by clicking on the gear wheel.
Using the MAC address under the Ethernet tab, it is possible to identify which network connects to which bridge.
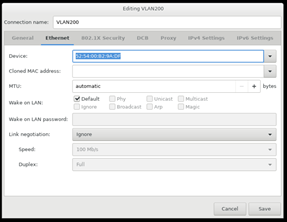
Edit the network, provide a suitable name and configure the IPv4 settings.

Repeat the steps for each network. Note: Only the network that provides customer access should have a gateway configured.
Reboot the PowerFlex Manager appliance to ensure that everything starts correctly
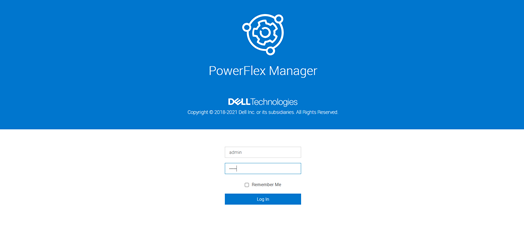
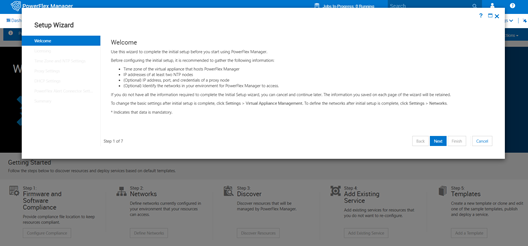
Once the appliance has rebooted, it should be possible to browse to the customer access IP address and start using PowerFlex Manager.
There is one caveat that needs to be highlighted when running PowerFlex Manager on a non-VMware hypervisor.
One nice feature that was introduced into PowerFlex Manager is the capability of deploying the PowerFlex Gateway and Presentation Server (GUI) virtual machines, unfortunately the method used to do this depends on VMware Virtual Distributed Switches.
Whilst this means the deployment of these two virtual machines cannot be fully automated in a KVM environment, they can of course be manually installed as Linux virtual machines and then be discovered as Resources by PowerFlex Manager (in the same way as if they were pre-existing Resources).
The example shown in this article provides a single management host running the PowerFlex Manager virtual appliance (and potentially other virtual machines) offering no protection in the event of host failure, it would of course be 100% possible to take the qcow2 image and deploy it into a KVM clustered environment, for example oVirt or Red Hat Virtualization. This would provide high availability for a KVM based management plane.

Great stuff Kevin — Next logical step would be to convert your build into an .iso image for the management node which includes all of this to have an amazing out of the box experience!
It is an excellent blog and we were able to fix our issue and run PxFM without any issues on OpenShift (KVM).
Thank you very much Kevin for your time and willingness to help others.
Very well documented and explained kudos
Hi! Kevin,
Thanks for your blog. I have one question to deploy pfmp on KVM. Althrough it works on KVM, I don’t see this scenario describe on 4.6.x install guide. Does Dell officially support this configure at production environment? Or Dell’s tse may reject if I need to open a case?
Many thanks for your comment.
BRs,
Hello, the PowerFlex team is now much more open to deploying PowerFlex Manager on KVM, so much so that they now provide pre-baked QCOW2 images on the support site for those customers who wish to ‘Bring Your Own (BYO)’ KVM hypervisor.
In time, Dell will also be introducing the option where they provide a KVM based management option.
Watch this space!!